Understanding Gas Lines and Potential Repair Needs
Gas lines are essential for delivering natural gas to appliances like stoves, water heaters, and space heaters in homes. These lines securely link key appliances to your home’s main gas supply, originating from the gas meter.
There are a few key reasons why gas lines may require repairs over time:
- General wear and tear - Persistent stress on your gas system from environmental factors and usage can eventually lead to leaks.
- Accidental damage – Landscaping or excavation works could potentially damage buried gas lines.
- Material failure – Old pipes may corrode and start to leak.
It is crucial to enlist a licenced gas fitter to inspect, detect and repair gas leaks, ensuring compliance with strict safety standards. DIY repair attempts can lead to worsening leaks or dangerous explosions. Qualified gas fitters utilise specific tools and expertise to accurately repair leaks:
- Accurately locate the source leak using gas detectors.
- Perform safe and competent repairs, especially with complex gas line issues.
- Dispense advice on preventive measures to avert any leaks in the future.
In addition to repairs, gas fitters can install new lines or replace existing ones following comprehensive inspections. This prevents hazardous leaks and ensures regular maintenance is conducted to keep appliances running securely in homes.
Locating the Source of the Gas Leak
Plumbing professionals employ specialised tools and advanced techniques to pinpoint gas leaks with precision. This includes:
- Gas detectors - Handheld devices that identify leaks by sensing methane or propane gases.
- Correlation technology - Compares ultrasonic signals from multiple sensors to identify defective sections.
- Pressure monitoring - Measures pressure drops along individual pipes to trace anomalies.
- Thermal imaging cameras - Highlights temperature differences caused by escaping gas.
- Robotic pipeline inspection gauges - Inserted into pipes to provide detailed scans.
- Leak detection fluids - Applied on joints, valves etc. to visually detect leaks.
Technicians also thoroughly check all appliances and visible piping for any signs of leaks. They ensure adequate ventilation and eliminate ignition sources during inspection. Upon identifying the leak’s source, professionals may recommend repair actions or suggest replacing sections, after cutting off the main gas supply.
Signs of a Gas Leak
It’s crucial to make sure you’re alert for tell-tale signs of a gas leak within the home. These include:
- A distinctive sulphurous or 'rotten egg’ smell, indicating a buildup of gas.
- Hissing, whistling or roaring sounds coming from appliances or metre.
- Dirt blowing from pipelines, Dead vegetation spots above buried gas lines indicating potential line leaks your yard should be vigilant about.
- Flickering gas flames, yellow rather than blue.
- Unusually high utility bills may indicate leaks.
Locating or repairing leaks without professional help is strongly discouraged.
Detecting signs of a leak should prompt immediate safety measures.
Minor leaks can be detected using soapy water on joints - bubbles will emerge at breach points.
Once a leak is confirmed, professionals can shut off the main gas valve and conduct safe repairs according to industry standards. This avoids the catastrophic risks of DIY repairs going wrong.
Safety Precautions When Repairing a Gas Line
When undertaking gas line repairs, remember that gas leaks can undermine safety, which should be the number one priority. Here are some key precautions to take:
- Turn off main gas valve - This crucial action halts the gas supply, averting further leaks or potential explosions during repairs.
- Ventilate the area - Open doors and windows to allow gas fumes to dissipate. This also prevents buildup where gas can become dangerous.
- Wear protective equipment - Don protective gloves, goggles, masks, and ear protection to shield against potential hazards.
- Use gas detectors - Handheld devices that accurately detect any gas residue before and after repairs.
- Eliminate ignition sources - No smoking, open flames or operating electrical equipment during repairs to avoid fires.
- Exercise caution - Prevent accidental damage to pipes and personal injury from tools during repairs.
Following safety protocols stringently prevents accidents and allows repairs to be completed smoothly. These measures also help avoid future issues that can cause leaks with the gas line over the long run.
Materials and Tools Needed for Gas Line Repairs
Performing gas line repairs necessitates the use of specific tools and materials. This guarantees that repairs are conducted correctly and safely. Key items typically needed include:
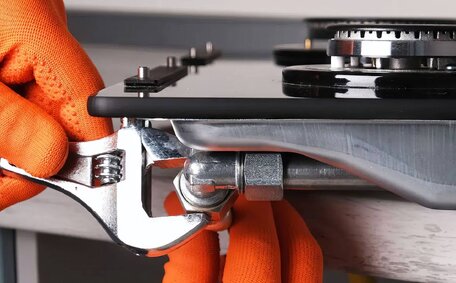
- Pipe wrenches - For grasping and turning pipes during repairs.
- Tubing cutters - To cut pipes to required lengths or remove damaged sections.
- Reamers and deburring tools - To smooth pipe ends for reconnection.
- Threading tools - For creating threaded joints on pipe ends.
- Pipe joint compound - Applied to prevent leaks at threads or fittings.
- Teflon tape - Wrapped around joint threads to enhance seals.
- New pipes & fittings - To replace leak-prone sections if required.
- Clamps & couplings - Used when joining pipes or sealing repairs.
- Soldering torches & materials - For securing joints on copper gas lines.
- Protective equipment - Gloves, goggles, hard hats etc. for safety.
With tools such as pipe wrenches, sealing materials, and protective gear, technicians can safely repair damages. Using the right materials ensures lasting and successful repairs, helping prevent future leaks.
The Gas Line Repair Process
Gas line repair is an intricate process demanding specialised training, equipment, and licensing. Here are the key steps involved:
- Assess the leak - The technician first determines the leak’s source, possibly taking time and employing sophisticated gas detectors and other equipment. They determine the severity of damage.
- Shut off the gas supply - For safety, technicians must shut off the main gas valve before beginning the repair work, halting further gas flow.
- Repair/replace section - Using tubing cutters, the faulty pipe section is removed. A threaded replacement piece is then installed and sealed with pipe sealant, eliminating any leaks.
- Pressure test - Air or nitrogen is pumped through the line to stress test pipe integrity. A steady pressure indicates an airtight seal.
- Check for leaks - Gas detectors are used to sniff out any residual leaks along the repaired section.
- Restore supply and check - Gas supply is restored at the gas meter, then appliances are fired up to ensure proper supply flow and pressure.
Maintaining ventilation, using protective gear, and removing ignition sources are essential throughout the repair process. Documentation and checks for potential gas compliance issues also need to be completed before handing back to the client.
Due to the intricate and risky nature of gas line repairs, it’s essential to engage licensed professionals. DIY attempts could worsen leaks or cause disastrous explosions. Licensed technicians possess the expertise required to conduct safe repairs.
Preventing Future Gas Line Leaks
There are several key steps homeowners can take to help minimise gas leaks in the future:
- Schedule regular inspections - An annual assessment by a licenced technician can identify early signs of potential issues.
- Follow manufacturer guidelines - Carefully follow all operating and maintenance instructions for gas-powered appliances.
- Look for warning signs - Be alert to any unusual smells, sounds or appliance issues that could indicate a leak.
- Upgrade old appliances - Replace very old gas appliances with modern, energy-efficient models less prone to wear and tear.
- Install carbon monoxide alarms - These can alert homeowners to dangerous gas buildups.
- Have gas lines encased - Buried gas pipelines can be protected from damage by encasing them in a protective sleeve.
- Refrain from planting trees over lines - To prevent tree root interference, which can damage underground gas pipes.
Proactive maintenance and alertness help reduce the risk of gas leaks. In case of a leak, immediately contact professional services — DIY repairs are unsafe.


